
 |
| Bubble, bubble, toil and trouble (for my husband because I think these will be staying out all year) |
My latest project? Apothecary jars for Halloween. I was inspired by a post that I found on Pinterest. It offered some really great ideas on how to make your own jars, but you had to buy the labels from her store. I like to challenge myself to see how many things from my house I can use to do my crafts, so I used my Open Office Writer program, a font that I found, and the lovely Google search tool to come up with some really great labels (which I am not including because I don't want to take profits from the woman that inspired this project. Go to her Etsy store and buy hers designs if you don't think you can make them. She has many beautiful items for sale).
All I did to make the labels was download the font (on my FREE Open Office Writer program), Google search "vintage frames" and right click and save the ones that I wanted, add some text boxes with the words to the center of the frame (again using Open Office Writer) and print them out. I know you can do this with Word, also, but I honestly have no idea how. I also used a website to get the wording for some of the spells on the labels. I'm pretty sure most of the spells on that site are made up by teenage girls with too much time on their hands, so the jars should be pretty safe to make without worrying about really cursing someone.
After printing the labels, I wanted an aged look to the white paper. To remedy this, I whipped up a cup of instant coffee, soaked some up with a paper towel and blotted the label paper with it. After it dried, I cut out the labels and glued them on to the jars. In hindsight, I wish I would have let them dry and repeated the process because they were quite as brown as I wanted them to be. After the glue dried, I went over them with some decopage glue (homemade, of course) so I could set them outside for decor and not have to worry about them getting wet.
To make the paper toppers for the jars, I just crumpled up some coffee filters (one for each jar) and stuffed them into the coffee that I had leftover from making the labels. I let them soak for a minute, then removed them and let them dry in the sun. I'll talk about attaching them after the individual jar tutorials.
Anywho, after I got all of that figured out, I finally got to the fun part (okay, I'm lame. Making the labels was just as fun for me). I had to decide what I wanted to stuff in my jars. My goal was to use the least amount of purchased materials as possible. To get the jars, I raided the fridge and used some old canning jars that my aunt had given to me. I also know that some friends that made the same project posted a request for jars in their Freecycle groups and got a TON of responses.
To get the materials for inside, I raided the entire house: the craft closet, my kids' bedrooms, the garden that was overgrown with weeds. Anywhere I thought I could find anything to stuff in a jar, I went there.
So how did I make out? With the exception of buying a cantaloupe (which we eat anyway), I didn't spend a penny. I was surprised at the amount of stuff I had lying around that could be used to do this project. Shredded black felt for the bat wool, weeds from the garden for Dragon's Breath and old silk flowers for the Love Spell. It all came together nicely and the jars look great. Below are some pictures and the instructions for the way I made my jars. With minimal money and effort, anyone can easily add these to their Halloween decor! (Definitely my kind of project)
DRAGON'S BREATH
 |
| "Fire in the air, fire on the ground. I use the fire that cannot be found. It comes out of my mouth in a blow. To people around me, my fire will show. (Cheesy, but whatever). |
 |
| I went the nature route since I imagine that not many dragon's lived in captivity. |
WOOL OF BAT
 |
| My husband asked if we could shear bats to make sweaters. |

TRUTH SERUM
 |
| "For ye who asks, the truth revealed. Open hearts, secrets revealed" (Kind wish I would have gone with "secrets spilled") |
 |
| Have fun tricking anyone into drinking this muck |
I had no clue what to do with this one. I had seen a suggestion to use pancake syrup, but I was worried about it leaking while it was being stored. My son suggested mixing some kind of greenish/brown concoction that would look like slime. I wound up mixing brown sugar (yes, I know, still sticky), water and two drops of green food coloring. There is a nice hint of brown that you can't see in the picture that gives it the look of some kind of sewer water. Gross, but I guess that is what we were going for.
WITCH'S BREW
 |
| Type O+, Extra Clotted |

I'm not sure if witches drink blood, but that is the route that I went. We had a bottle of fake blood from a previous Halloween that the kids kept using to make giant messes, so I figured I would dump it in here to get it out of their reach forever. To give the illusion of clots, I plopped a few globs of Vaseline in there. I would have used plain gelatin instead, but I didn't have any on hand. The Vaseline definitely gave it a clumpy look, but I couldn't really get it to show up in the picture.
EAR OF TROLL
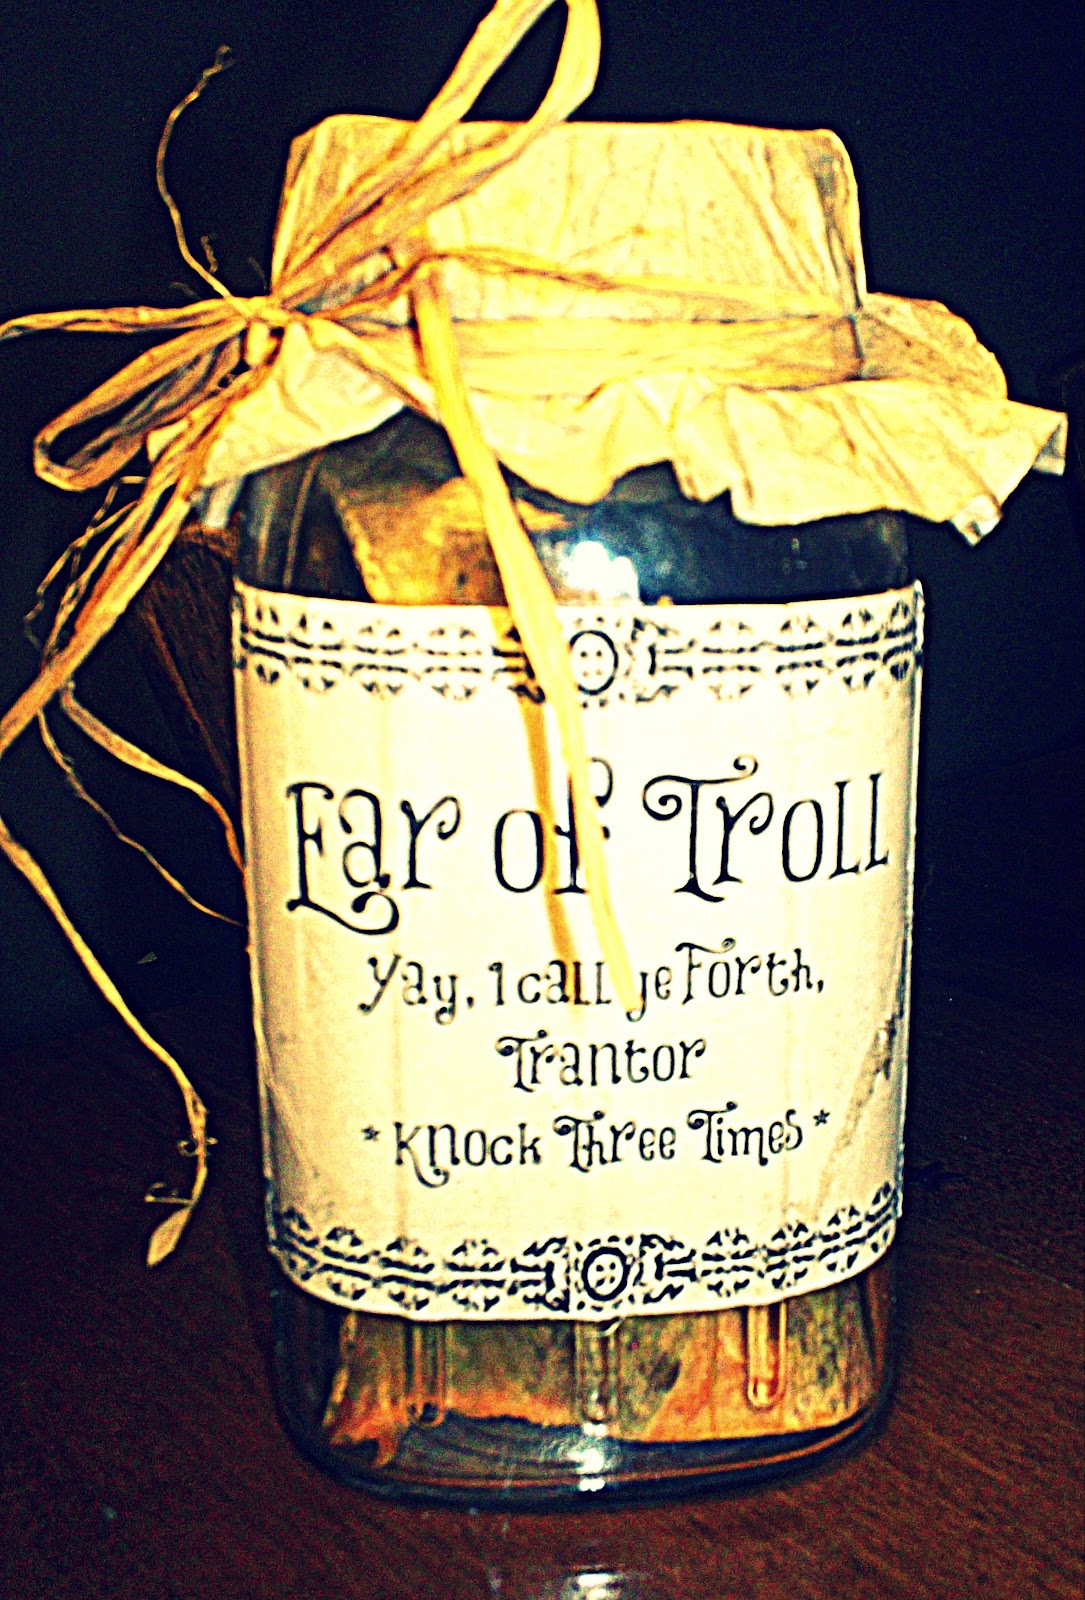 |
| "Yay, I call ye forth, Trantor!" (I love Ernest Scared Stupid. One of my favorite Halloween movies) |
 |
| I wonder how badly this would smell if I opened it after Halloween? |
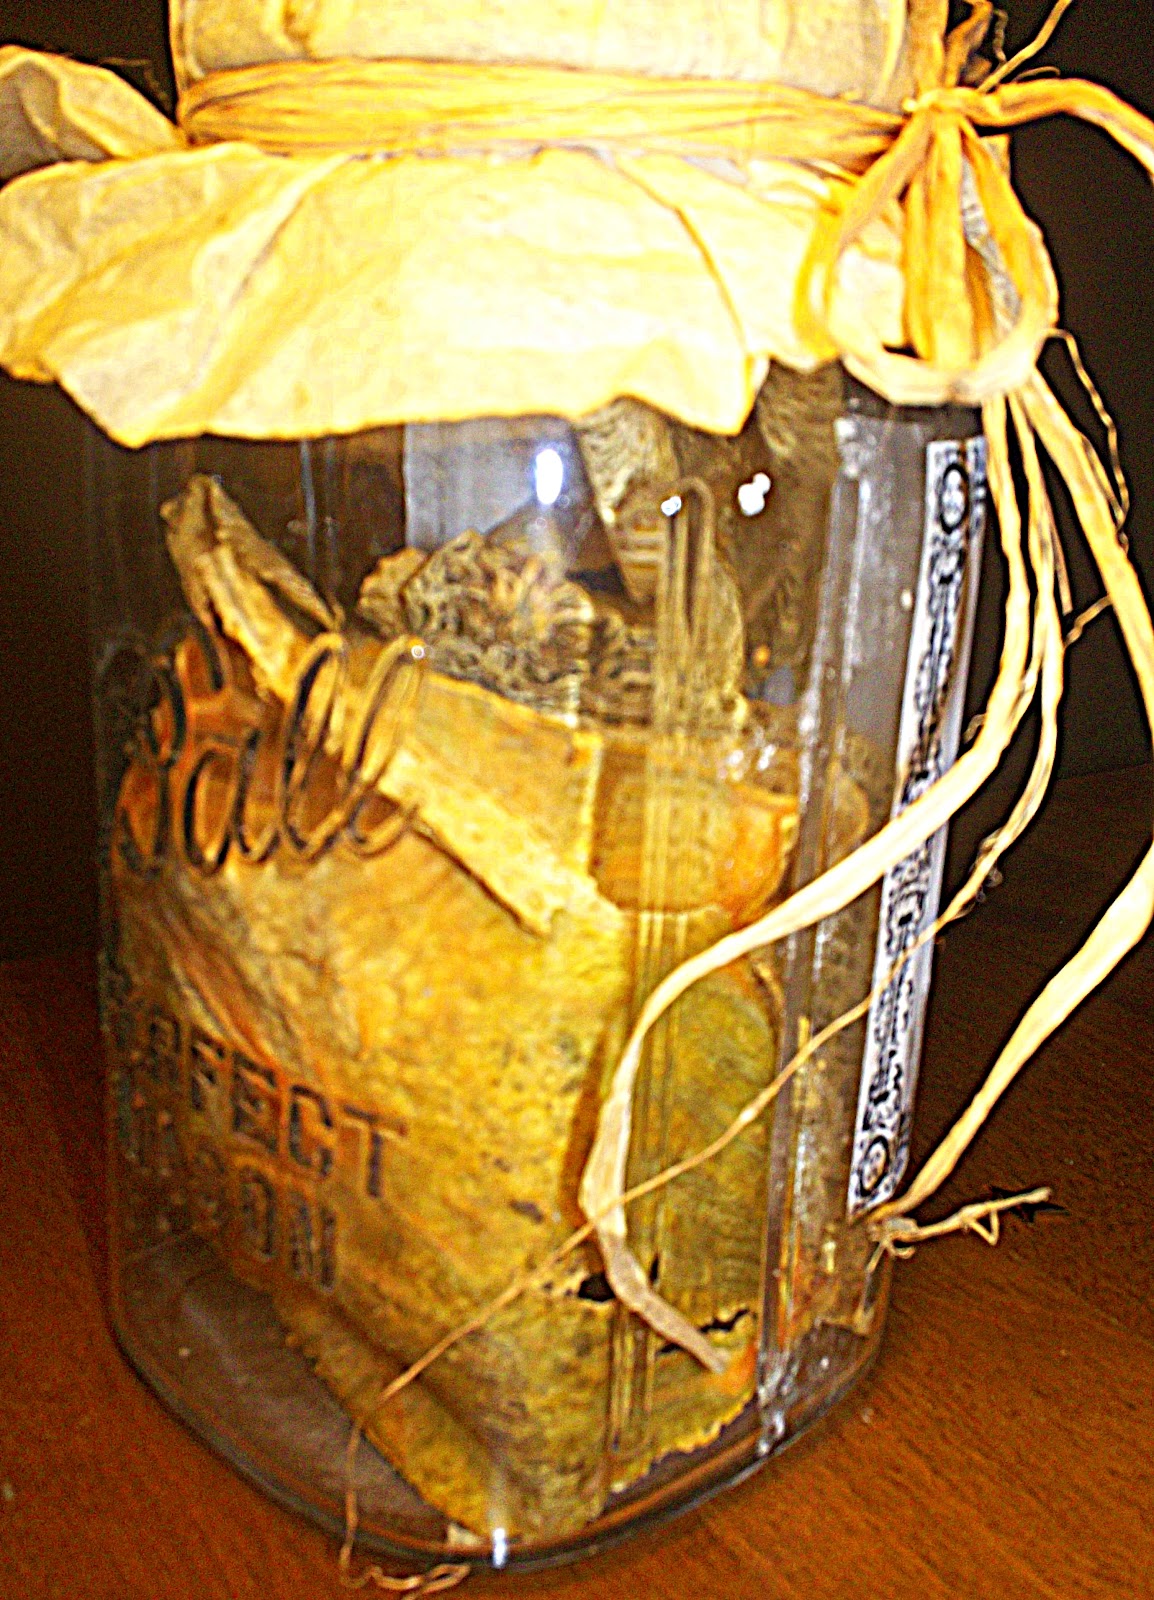
This was one of my favorites. The original post with the labels for sale suggested using a cantaloupe skin that had been sitting in a compost heap for a while. Since we haven't opened our compost bin in a month or so, and I could see a nice stream of liquid flowing out weekend before last, I decided to dry my own. I bought a cantaloupe from Giant (on sale for $1.49), cut it in half and then cut each half into quarters so they resembled ears. After I scooped out all of the flesh, I baked them on a cookie sheet at 250 degrees for about 2 hours. They weren't quite dry, but the little bit of remaining flesh was easy to peel out. I peeled it as good as I possibly could and then popped them back in for another hour. They were pretty crunchy and "ear-like" by the time they were done.
Another suggestion on the original post was to use orange or avocado skins that have been dried. That may be easier than using a cantaloupe skin, but WOW these things look creepy!
LOVE SPELL
 |
| "Let the on that drinks this wine shower me with a love divine. Sweet love potion no. 9, make this love forever mine." *Must be sealed with a kiss* |
 |
| I used the Victoria's Secret Love Spell be my inspiration for this one |

I also loved making this one. I found the spell on the website mentioned above and added it to the label. Since the only thing I could not find in my entire house was glitter, I wound up using a tube of purple glitter glue that I found at the bottom of my daughter's toy box and some silver glittery fabric paint to get the shimmer that I needed. I added them to a bowl (or you could just add the glitter that every other family has lying around) and mixed it with enough water to fill the jar. I added some purple gel food coloring from the neon collection and whisked it until it got to the color that I wanted (it was a little milky since the glitter fabric paint had some opaqueness in it). I then snipped petals from old silk flowers I had leftover from a garden party hat project, dug up some confetti I bought for another project and pulled a few strands of silver tinsel out of the Christmas craft bin and put them in the jar. I poured the purple glitter water over the stuff in the jar, shook it up and VIOLA! I had the perfect love spell.
HEX NO. 23
 |
| With this knot, to me you're tied And Only for me shall you grow. Another's bed you will never lay Stray you shall never go. If a vixen tempts your truth And you decide to roam Limp and flaccid you shall be Until you come back home. |
 |
| The lucky guy that's been cursed to have a non-working man part. |
 |
| This stick was meant to resemble a you-know-what. Tee hee. |
I made this one out of the blue after finding an "impotence spell" on the spell website. It was an awful rhyme that I rewrote to be not quite as awful. Hopefully people will get a chuckle. I tried to go with something phallic to resemble the item being binded in the spell. I wrapped a stick with black felt, red ribbon and a branch from a briar bush. I also tied a lock of hair (cut from an old doll) into the bunch. I added a set of old cufflinks to an organza bag I received as a wedding favor, a printed picture of the "couple" (that I found randomly in a Google search) and some plants (a butterfly bush clipping and some spiky holly leaves). I guess that is all of the ingredients needed to keep a penis from ever rising again.
EYE OF NEWT
 |
| BEFORE the oil spill |

This one was by far the easiest (or so I thought). I threw some coriander and black peppercorns into a jar, sprinkled them with paprika and poured in some canola oil. Shake and that's pretty much it. The paprika clung to the bottom and made it look like it had been sitting for a while and it also changed the color of the oil to a murky brownish/yellow. Thinking that I would prevent leaks, I attempted to glue the jar lid shut with a hot glue gun. DO NOT FREAKING DO TRY THAT! I wound up screwing up the track for the lid and it leaks all over if it is tilted. Maybe you can try regular craft glue or something, but DO NOT hot glue it. Looks like this one is now a permanent decoration in our house because I am terrified to put it in storage.
MERMAID HAIR
 |
| Ocean Goddesses, Far and Near Listen Now, Please Lend Me Your Ear My Wish is Simple As You Will See: To Become a Mermaid of the Sea |
 |
| I hope you have a lot of freaking yarn or a smaller jar |
This was another that was inspired by the original post. Instead of using twine, I used a very brightly colored, tie-dyed yarn that I had leftover from another project. My step-daughter and I pulled it apart into little frays and tossed it in the jar. I figured that mermaids might have pretty multi-colored hair to match their tails so it worked well. We threw in a couple of seashells that we had leftover from a beach excursion and called it a day. I might suggest filling the bottom quarter to half of the jar with sand because we used A LOT of yarn to fill this jar (a quart canning jar). It kept settling and we would have to add more. It has even settled more since we first made it so I think I will open it and add some sand before next Halloween.
NIGHTMARE DUST
 |
| The first jar I made. Can you tell or what? |
 |
| WARNING: Do Not Open Until After Darkness Sets! |
I'll start off by saying that I am not completely happy with how this one turned out and I think I may redo it. It was my first one and I was sort of feeling my way through the project at this time. To do it, I took baking soda and dyed it with purple food coloring. I then took Epson salt (since glitter is non-existent around here) and dusted the inside of a smoked out candle jar with it. I poured the purple stuff in and called it a day. I was hoping that the salt would look like sugar, but it wound up absorbing the purple food coloring and it just looks crusty on the inside of the jar. I am thinking some kind of black lead dust (or crushed up black chalk), glitter (once I decided to break down and spring for the $2.49 pack at Walmart) and a few of the silver confetti stars I have leftover would look much more like something used to conjure up a nightmare or two. We'll see how much more I feel like doing before Halloween.
So that is all of them. With the exception of the Nightmare Dust, I am very happy with the way that they turned out. They even gave me some family quality time in that my kids were actually enthusiastic about helping me make the stuffing of a few of them. I hope that after reading, you decide to make some of your own. They are cheap (my total cost was $1.49 for the cantaloupe since I recycled and repurposed everything else), they are easy and they look really great sitting around for Halloween. Use them as part of a centerpiece for a costume party, use them to spookify a bookshelf or sit them outside next to a cauldron. But don't be surprised at the amount of people that stop to ogle your goodies and give you compliments.
Now, as promised, I will explain the paper toppers. After the coffee filters dried, I spread some hot glue on the top of the jar lids and stuck the topper on it. I pressed it down with a pot holder (since it is called hot glue and you can really feel it through the thin little coffee filter) and held for a few seconds until it was set. I then took a rubber band and put it over the lid so it rested under the lip of the jar lid. I used raffia (that I rescued from the neighbor's junk pile during spring cleaning) to make ties around the rubber band to hide it. I doubled it on some, made bows or just knotted it. You can use twine or ribbon or even long weeds that you find in your overgrown garden. The possibilities are endless.
Now, as promised, I will explain the paper toppers. After the coffee filters dried, I spread some hot glue on the top of the jar lids and stuck the topper on it. I pressed it down with a pot holder (since it is called hot glue and you can really feel it through the thin little coffee filter) and held for a few seconds until it was set. I then took a rubber band and put it over the lid so it rested under the lip of the jar lid. I used raffia (that I rescued from the neighbor's junk pile during spring cleaning) to make ties around the rubber band to hide it. I doubled it on some, made bows or just knotted it. You can use twine or ribbon or even long weeds that you find in your overgrown garden. The possibilities are endless.
I hope you enjoyed the ideas and you are inspired to make your own Halloween apothecary jars!
 |
| I also recycled some cocktail mixer jars and added them to my display. |
 |
| I threw in the skeleton bride and groom that topped our wedding cake because I couldn't bear to put it away until after Halloween. |

 |
| The little stone tart warmer on the right of the picture? I found that next to the raffia that my neighbor gave me on clean-up day. |
 |
| The entire collection...so far. |


